Finding water stains on your ceiling can catch any American homeowner off guard. The reality is, even a minor roof issue can quickly escalate and threaten your entire home. Over 60 percent of American roof leaks begin with undetected minor damage. This makes early inspection and maintenance absolutely vital. With clear steps and practical tips, you can protect your roof from costly problems before they start.
Table of Contents
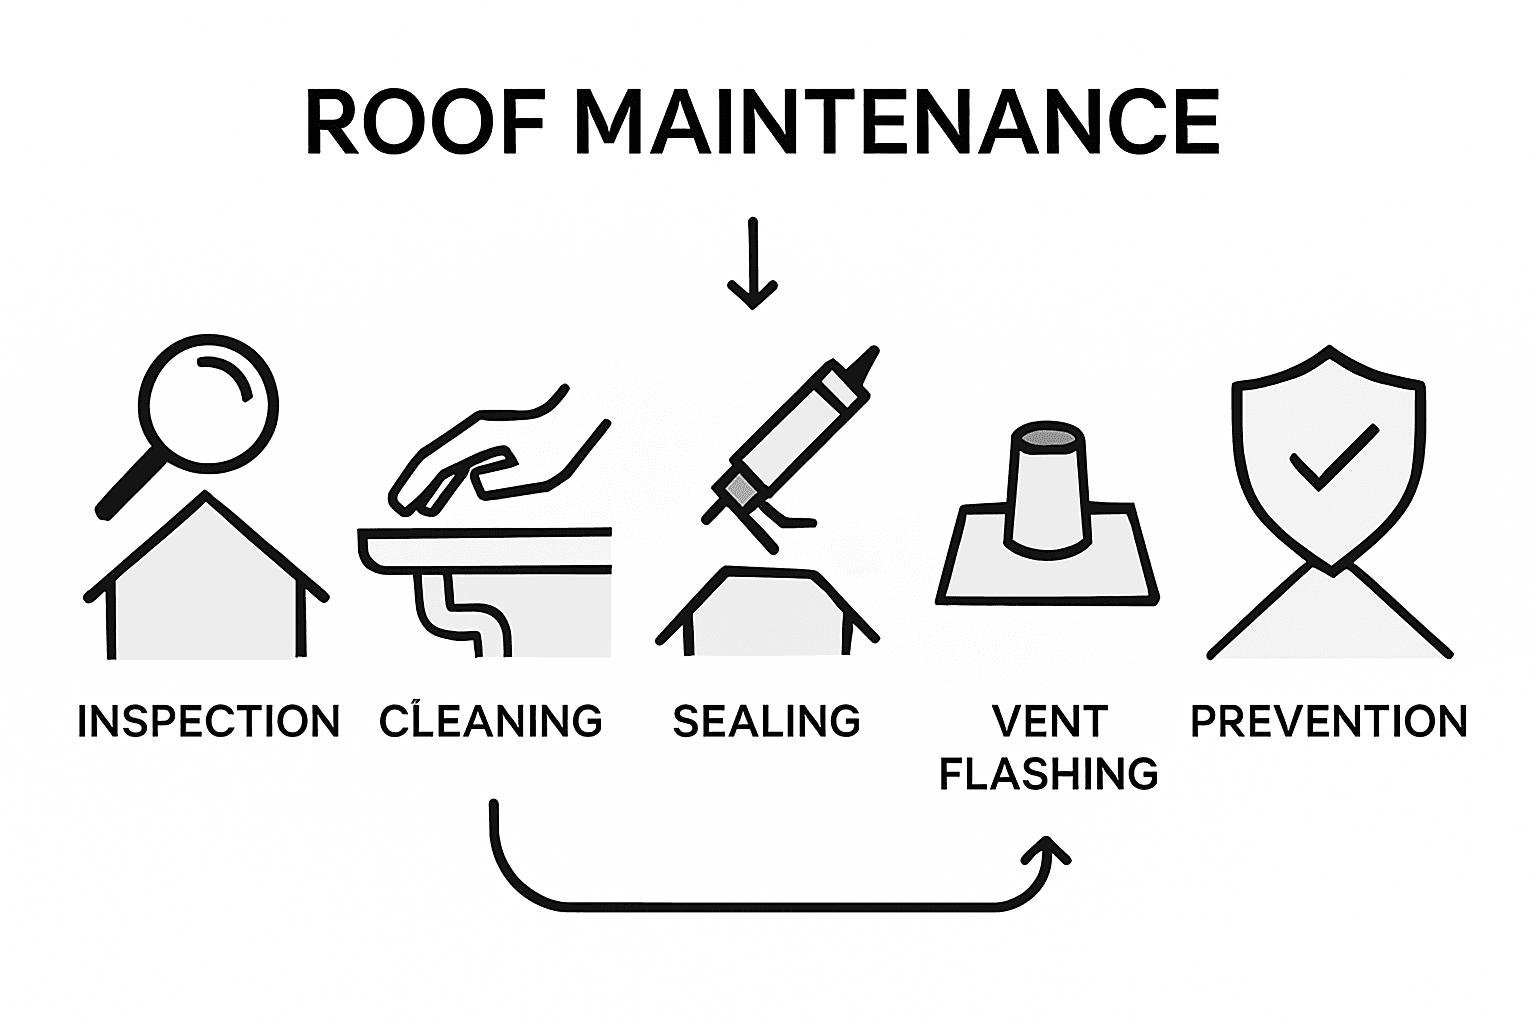
- Step 1: Inspect Your Roof For Damage
- Step 2: Clean Gutters And Downspouts
- Step 3: Seal Vulnerable Roof Areas
- Step 4: Address Flashing And Vent Issues
- Step 5: Verify Your Roof’s Watertight Integrity
Quick Summary
| Key Takeaway | Explanation |
|---|---|
| 1. Regular roof inspections are essential | Detecting damage early prevents leaks that could harm your home’s integrity. Conduct thorough visual inspections and document findings. |
| 2. Clean gutters to prevent water damage | Maintain gutters and downspouts to ensure rainwater is diverted away from your foundation, reducing the risk of leaks. |
| 3. Seal vulnerable roof areas diligently | Apply high-quality sealants to gaps and cracks around chimneys, vents, and other penetrations to prevent water infiltration. |
| 4. Inspect and maintain flashing and vents | Regularly check flashing and vent seals for deterioration and repair to decrease the risk of leaks around roof penetrations. |
| 5. Verify roof’s watertight integrity biannually | Perform watertight inspections in spring and fall to identify and address potential vulnerabilities before they cause major issues. |
Step 1: Inspect your roof for damage
Detecting roof damage early is crucial in preventing potential leaks that could compromise your home’s structural integrity. Visual inspection serves as your first line of defense against water infiltration and costly repairs.
Begin by conducting a thorough ground-level examination of your roof’s exterior. Look for obvious signs of wear including missing, cracked, or curling shingles, which can create vulnerable entry points for water. Pay special attention to areas around chimneys, vents, and skylights where roof cladding damage can develop. Check for loose or damaged flashing that might allow water to seep underneath protective layers.
Using a sturdy ladder, carefully perform a closer inspection if you feel comfortable and can do so safely. Look for granule loss on asphalt shingles, signs of moss or algae growth, and any areas where the roofing material appears uneven or compromised. Check for rust on metal components and inspect fascia and soffit areas for water stains or wood rot. Document any concerning areas with photographs for potential future reference or professional consultation.
Pro tip: Always prioritize safety when inspecting your roof. If you are uncomfortable with heights or lack proper equipment, consider hiring a professional roofing contractor who can perform a comprehensive assessment without risking personal injury.
Compare professional vs. DIY roof inspection in terms of coverage and safety:
| Factor | Professional Inspection | DIY Inspection |
|---|---|---|
| Safety | High, with proper equipment | Depends on personal experience |
| Problem Detection | Comprehensive, uses experience | May miss subtle issues |
| Equipment Used | Commercial tools and ladders | Basic ladders and binoculars |
| Time Required | Typically 1-2 hours | Varies, often longer |
Step 2: Clean gutters and downspouts
Properly maintaining your home’s gutters and downspouts is essential in preventing roof leaks and protecting your property from water damage. This critical maintenance step helps ensure that rainwater is effectively channeled away from your home’s foundation and exterior walls.
Begin by gathering necessary equipment including a sturdy ladder, work gloves, a garden trowel or gutter scoop, a bucket, and a garden hose. Systematic gutter inspection and debris removal involves carefully removing leaves, twigs, and accumulated dirt from inside the gutters. Work systematically along the gutter length, placing debris directly into your bucket to prevent messy ground cleanup. After manually clearing solid materials, use your garden hose to flush remaining smaller particles and check for proper water flow.
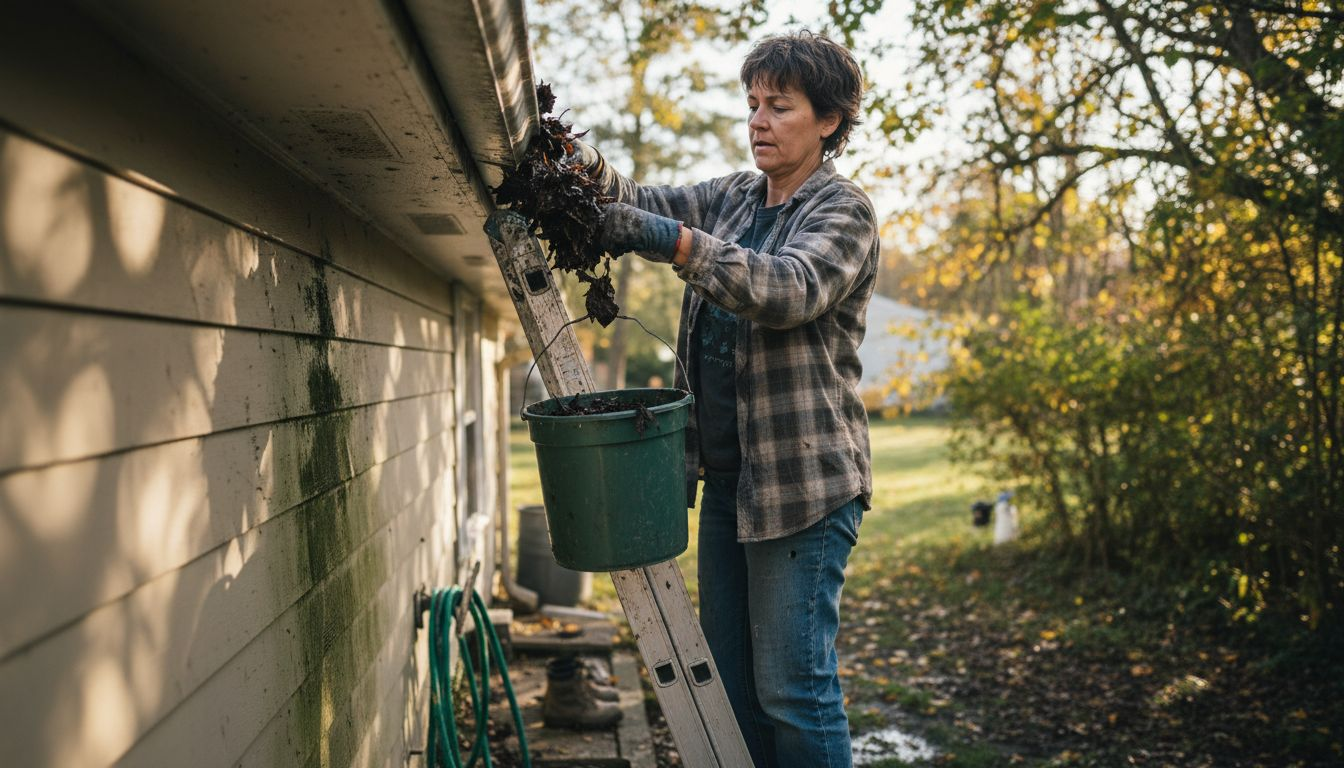
Pay special attention to downspouts, ensuring they are clear of obstructions and directing water at least three to four feet away from your home’s foundation. Test the drainage by running water through the gutters and observing its path. Look for any signs of sagging, rust, or separation between gutter sections that might indicate needed repairs. If water pools or overflows during your test, you may need to adjust gutter pitch or address potential blockages.
Pro tip: Consider installing gutter guards to minimize future debris accumulation and reduce the frequency of manual cleaning. These protective covers can significantly decrease maintenance time and help prevent potential water damage to your home.
Step 3: Seal vulnerable roof areas
Preventing roof leaks requires strategic attention to areas most susceptible to water penetration. Understanding and sealing these vulnerable zones can significantly reduce the risk of costly water damage to your home.
Systematic roof penetration sealing focuses on critical areas including chimneys, skylights, vent pipes, and roof junctions. Start by carefully inspecting these zones for existing cracks, gaps, or deteriorating sealant. Use a high quality silicone or polyurethane based sealant appropriate for exterior roofing applications. Apply the sealant carefully around flashing edges, ensuring complete coverage without leaving air pockets or uneven surfaces. Pay special attention to areas where different roofing materials meet, as these transitions are prime locations for potential water infiltration.
For areas around roof penetrations like plumbing vents or satellite dish mounts, use specialized roof sealants that can withstand temperature fluctuations and UV exposure. Carefully clean the surface before application, removing any old caulk or debris to ensure proper adhesion. Check manufacturer recommendations for specific application techniques and drying times. Inspect your sealed areas annually and reapply sealant as needed to maintain a watertight barrier.
Pro tip: Purchase professional grade sealants specifically designed for roofing applications and always work on dry surfaces during moderate temperatures for optimal results.
Step 4: Address flashing and vent issues
Flashing and vent systems play a critical role in protecting your roof from water infiltration and potential structural damage. Understanding how to properly inspect and maintain these components can significantly extend the life of your roofing system.
Comprehensive roof penetration inspections require careful examination of metal flashing around chimneys, skylights, and roof vents. Check for signs of rust, corrosion, or separation from surrounding roofing materials. Use roofing cement or specialized flashing sealant to repair small gaps or cracks. For more significant damage, consider replacing entire sections of flashing to ensure a complete watertight seal. Pay special attention to areas where flashing meets different roofing materials, as these transition points are most vulnerable to water penetration.
For roof vents, inspect the rubber boot seals and metal collars that prevent water from entering around pipe penetrations. Look for cracking, deterioration, or gaps that could allow moisture to seep into your attic space. If you notice any compromised seals, carefully remove the old sealant and replace with a new weatherproof boot or apply a fresh layer of roofing sealant. Ensure that all vent connections are tight and properly aligned with the roof surface to minimize potential leak points.
Pro tip: When working on roof flashing and vents, use UV resistant silicone sealants that can withstand extreme temperature variations and maintain flexibility over time.
Step 5: Verify your roof’s watertight integrity
Ensuring your roof remains watertight is the final critical step in preventing potential water damage and protecting your home’s structural integrity. A comprehensive inspection can help you identify and address potential vulnerabilities before they escalate into costly repairs.
Systematic roof surface inspections require a methodical approach to detecting potential weaknesses. Start by examining your roof from both interior and exterior perspectives. Inside your attic, look for telltale signs of water infiltration such as dark spots, moisture stains, or wood discoloration along rafters and roof decking. These indicators can reveal hidden leaks that might not be immediately visible from the outside.
Outside, conduct a thorough visual examination of your entire roof surface. Look for missing or damaged shingles, areas of sagging or uneven surfaces, and any visible cracks or separation in roofing materials. Pay close attention to roof valleys, edges, and areas around chimneys or vents where water is most likely to penetrate. Use binoculars if you cannot safely access a closer view, and document any areas of concern with clear photographs. If you discover significant issues or feel uncertain about your findings, consider scheduling a professional inspection to get a comprehensive assessment of your roof’s condition.
Pro tip: Perform these watertight integrity checks twice annually spring and fall to catch potential problems before they become major repairs.
Here is a summary table of common roof vulnerabilities and solutions:
| Vulnerable Area | Typical Issue | Recommended Solution |
|---|---|---|
| Roof valleys | Water pooling | Ensure clear drainage, re-seal |
| Around chimneys | Flashing separation | Inspect and replace flashing |
| Skylight edges | Cracked caulk | Apply new silicone sealant |
| Roof vents | Deteriorated boot | Replace with new weatherproof boot |
| Roof edges | Missing shingles | Repair or replace immediately |
Protect Your Home from Costly Roof Leaks with Sabatalo Contracting
Roof leaks can cause serious damage if left unchecked. From damaged flashing and deteriorated sealants to clogged gutters and vulnerable roof valleys, these issues threaten your home’s watertight integrity and peace of mind. If you want to avoid unexpected repairs and maintain your roof’s durability, expert help is your best choice. Sabatalo Contracting & Home Improvement brings over 15 years of local experience helping Massachusetts homeowners safeguard their roofs with professional exterior solutions including roofing, gutters, and sealing.

Don’t wait for a small problem to turn into a major repair. Trust our craftsmanship and dedication to quality for comprehensive inspections and repairs. Visit our home page, explore how we enhance roofing systems, and secure your home today. Request a personalized consultation now and take the first step to a leak-free roof with Sabatalo Contracting.
Frequently Asked Questions
How can I inspect my roof for signs of damage?
Start by conducting a visual examination from the ground, looking for missing, cracked, or curling shingles and any damage around chimneys or vents. Use a sturdy ladder for a closer inspection if you’re comfortable, checking for issues like granule loss and rusted components. Document any damage with photographs for future reference within the next week.
What tools do I need for cleaning gutters and downspouts?
Gather a sturdy ladder, work gloves, a garden trowel or gutter scoop, a bucket, and a garden hose. Use these tools to remove debris from the gutters systematically, ensuring clear pathways for rainwater to flow within one to two hours.
How should I seal vulnerable areas on my roof?
Inspect areas around chimneys, vents, and skylights for cracks or gaps, then apply high-quality silicone or polyurethane-based sealant. Ensure complete coverage without leaving air pockets, aiming to finish this sealing process within a few hours for maximum effectiveness.
What are the common issues with roof flashing and vents?
Common issues include rust, cracking, or separation at the seams of flashing and around vent pipes. Repair small gaps with roofing cement, and ensure all connections are tight to prevent leaks, aiming to complete this inspection within a single afternoon.
How often should I verify my roof’s watertight integrity?
Conduct a thorough inspection of your roof’s watertight integrity at least twice a year, ideally in spring and fall. Look for signs of water infiltration from both inside and outside your home, aiming to address any issues within a few days of detection to avoid costly repairs.
Recommended